Overview
Many websites send verification codes via email as part of their two-factor authentication process. By forwarding these emails to Kaizen, your workflows can automatically extract and use these codes during login, eliminating the need for manual intervention.Prerequisites
Before you begin, make sure you have access to the Gmail account that receives the 2FA verification emails you want to forward to Kaizen.Step-by-Step Setup
Step 1: Open Gmail Settings
In Gmail, click the gear icon in the top right corner to open Quick settings, then click “See all settings” to access the full settings page.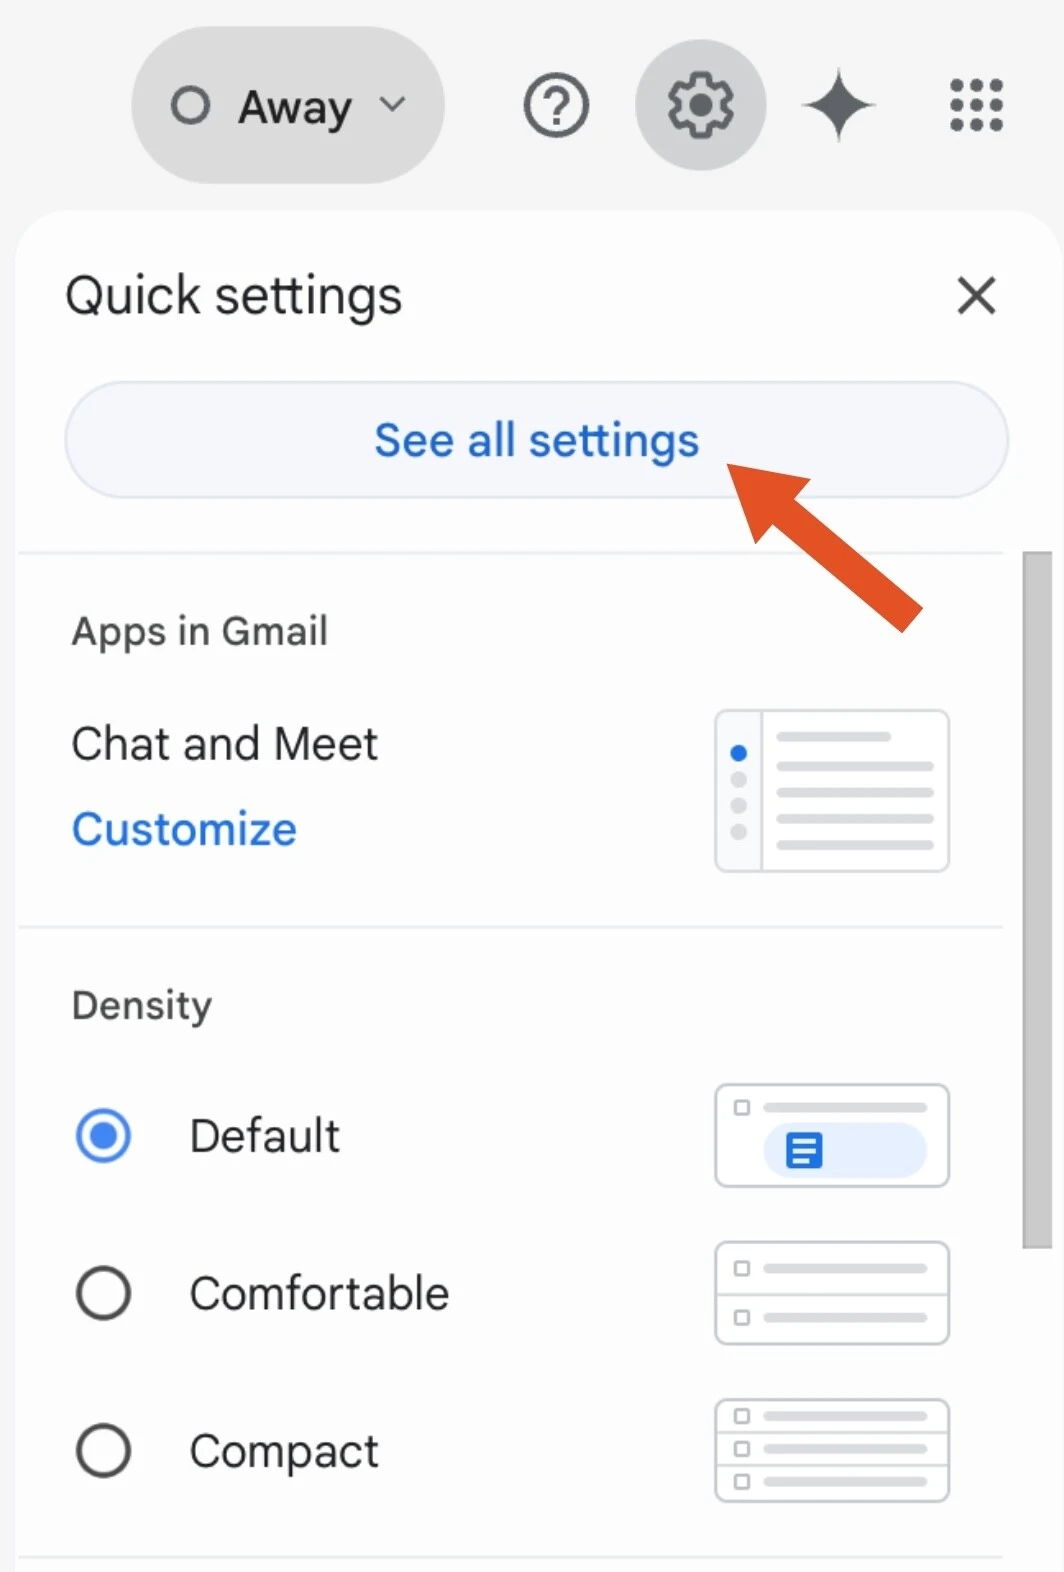
Step 2: Navigate to Filters and Create a New Filter
In the Settings page, click on the “Filters and Blocked Addresses” tab. Scroll down to the bottom of the page and click “Create a new filter”.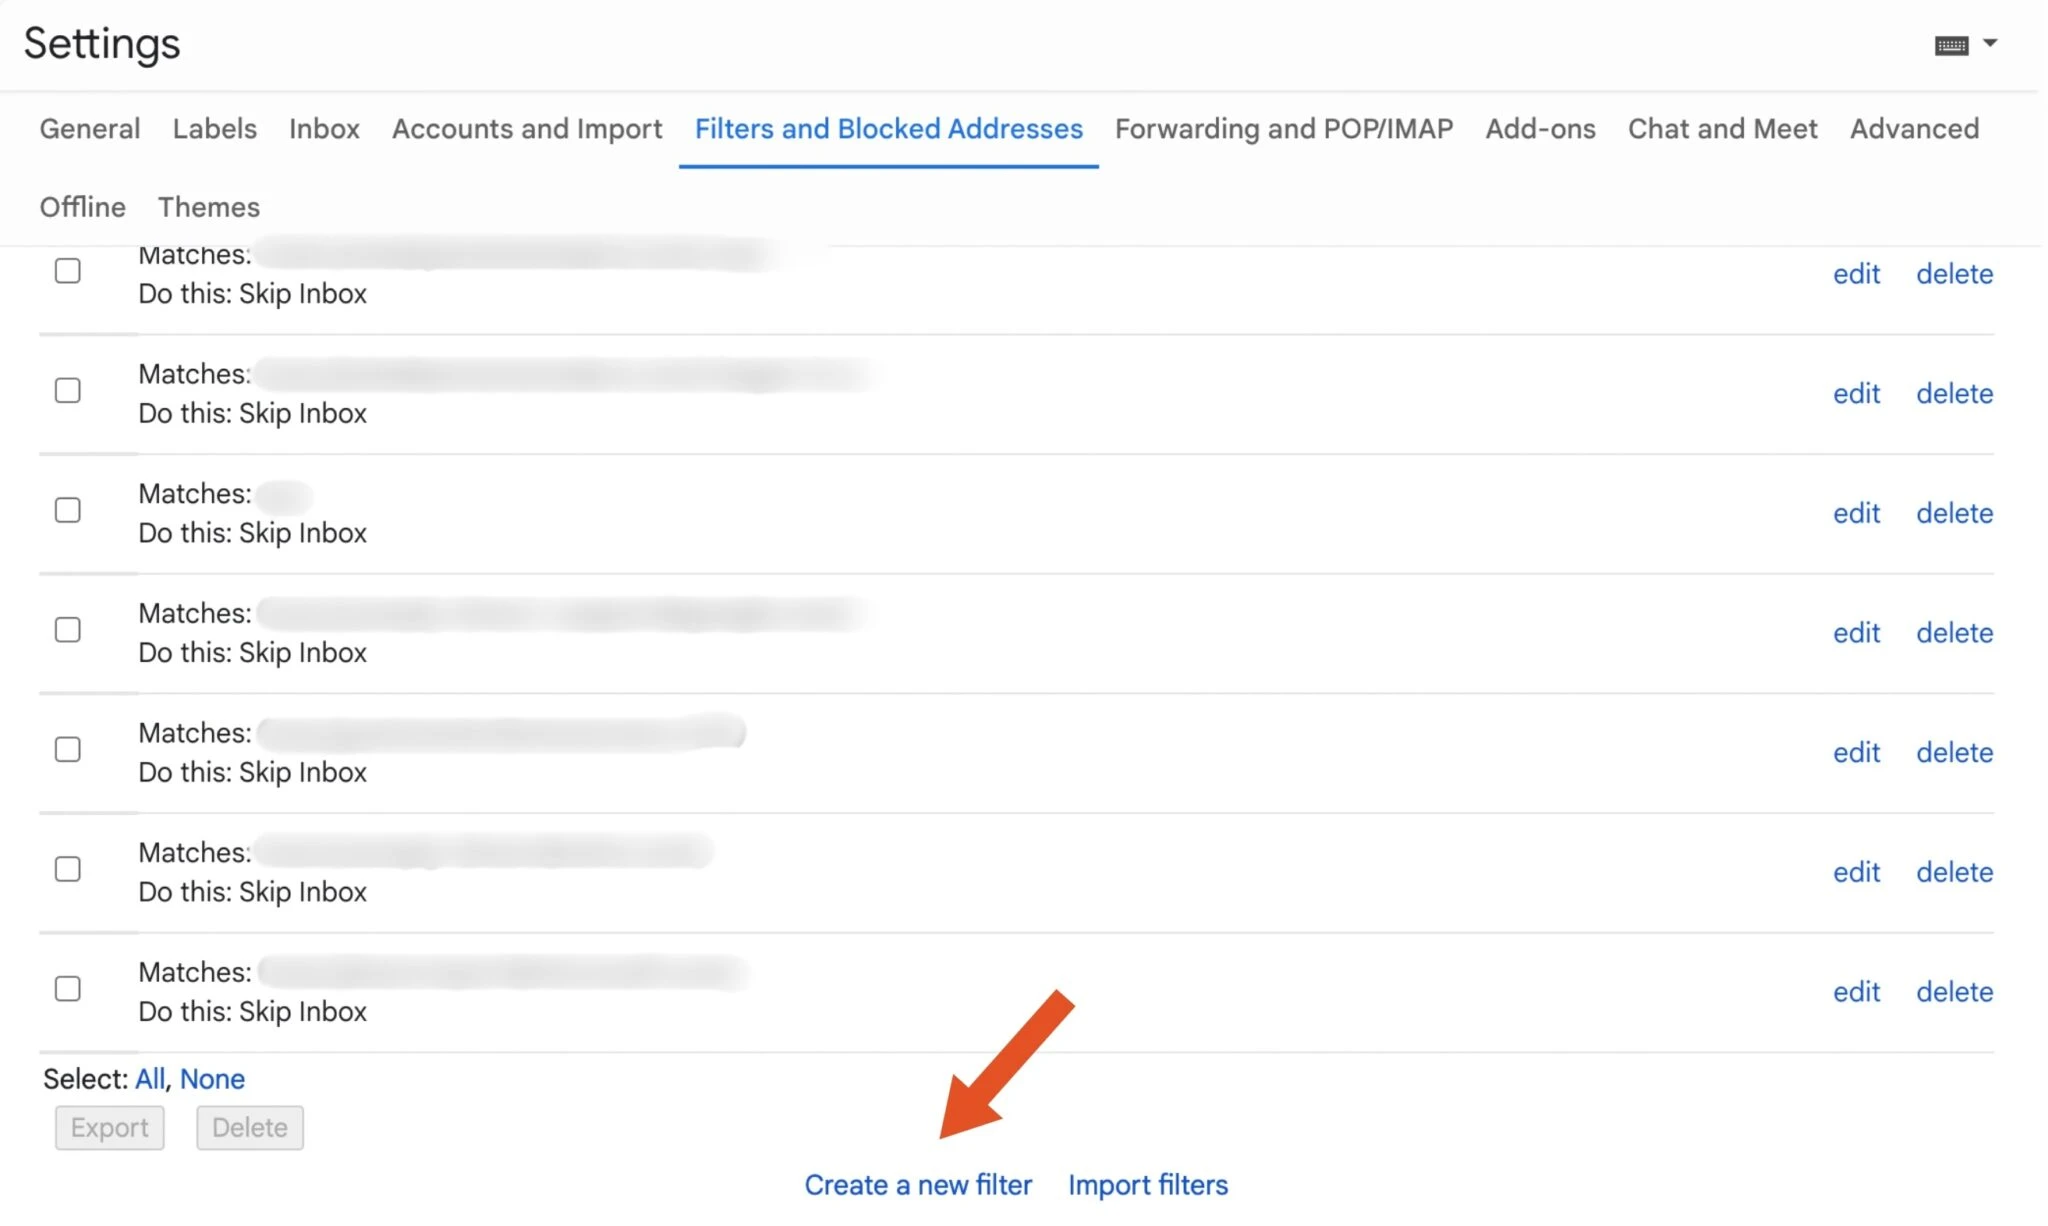
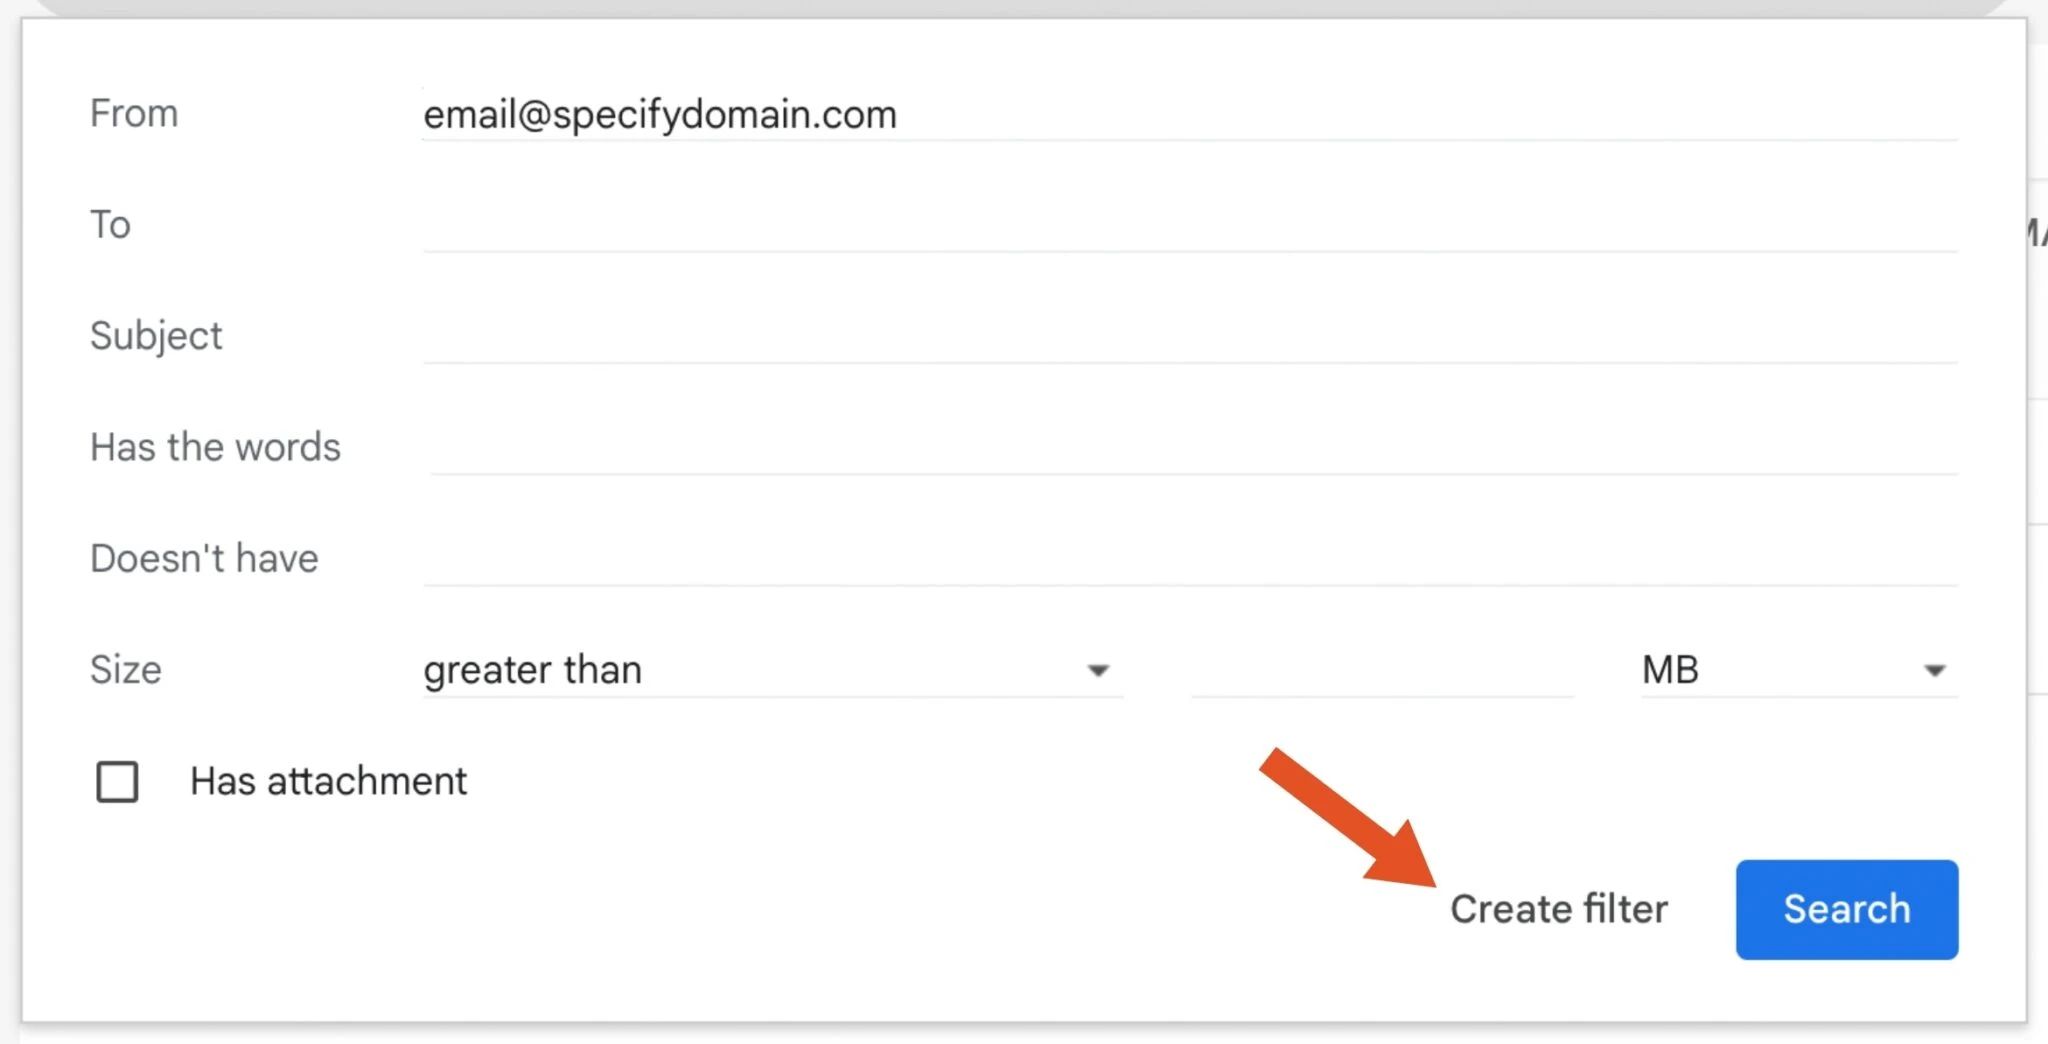
Step 3: Set Filter Criteria
In the filter creation dialog, enter the email address that sends your 2FA codes in the “From” field. This should be the sender address of the verification emails from the service you want to automate (for example,noreply@example.com).
After entering the sender address, click “Create filter” to proceed to the next step.
Step 4: Enable Email Forwarding
In the filter actions dialog, check the “Forward it to:” checkbox. You will need to add the Kaizen forwarding address if you haven’t already. The forwarding address to use is: codes@mfa.kaizenautomation.com
If you haven’t added the forwarding address before, click “Add forwarding
address” to add
codes@mfa.kaizenautomation.com as a forwarding destination.
Gmail will send a verification email to confirm the forwarding address.Step 5: Create the Filter
After selecting the forwarding option and choosing the Kaizen forwarding address, click “Create filter” to save your filter.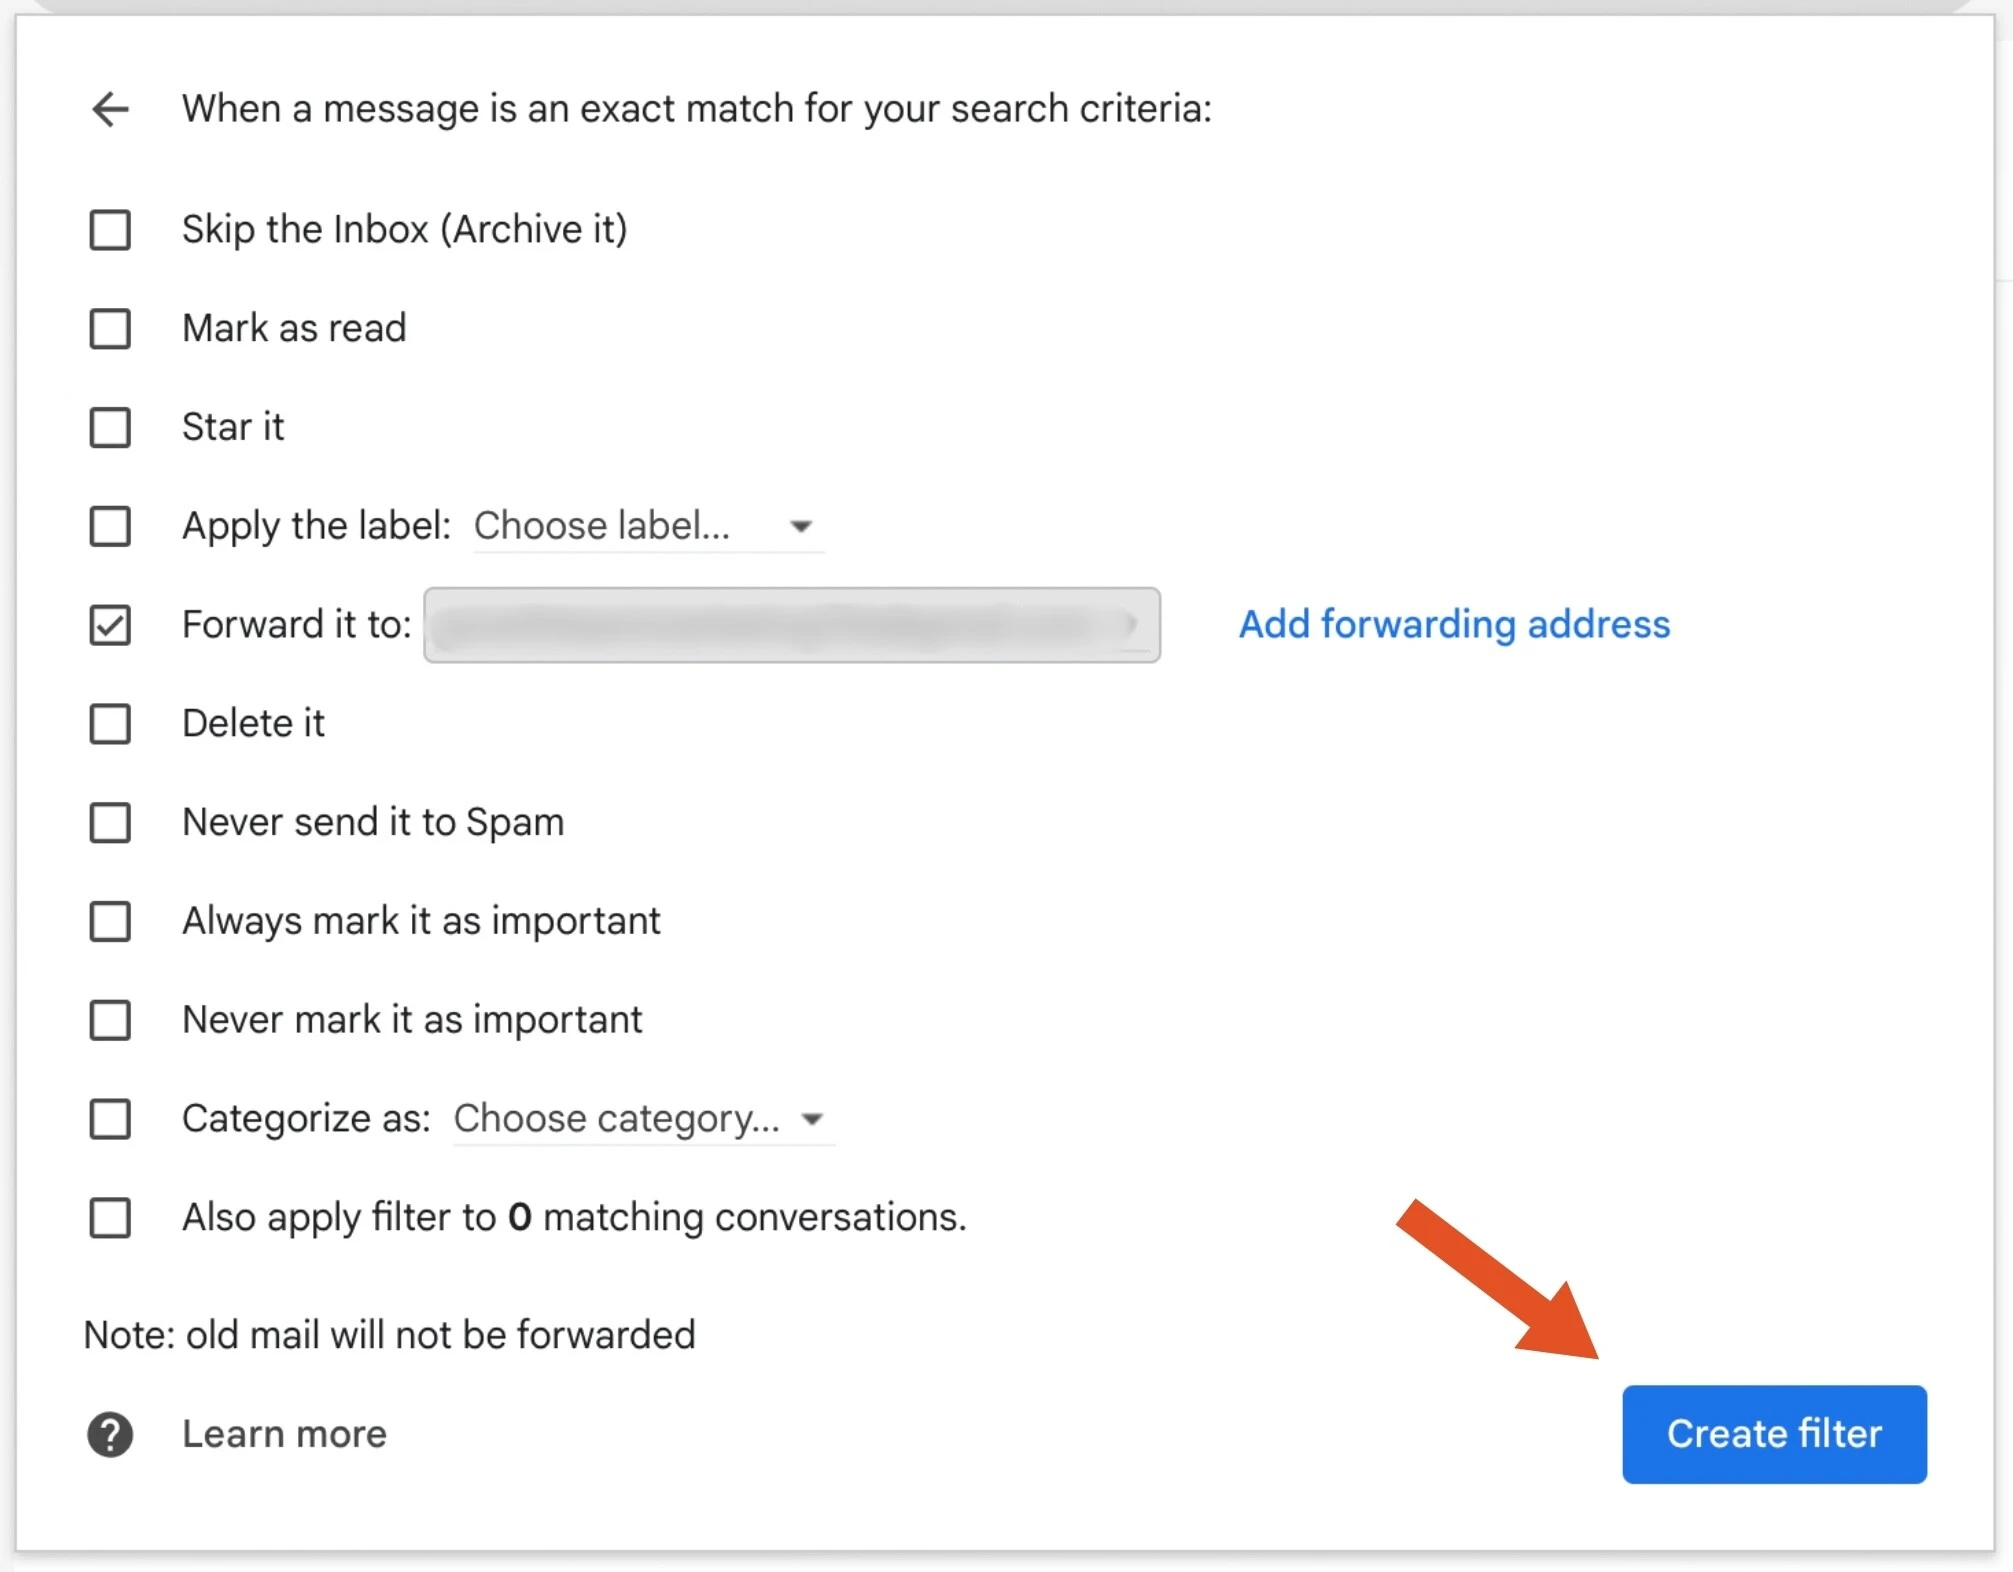
Step 6: Contact Kaizen to Verify Setup
After creating the filter, reach out to the Kaizen team to confirm that we have received a verification email from Gmail. This step ensures that the forwarding is properly configured and that Kaizen can receive your 2FA emails.Using Email 2FA in Your Logins
Once the forwarding is set up and verified, you can configure your logins in Kaizen to use Email as the two-factor authentication method. When your workflow encounters a 2FA challenge, Kaizen will automatically retrieve the verification code from the forwarded email.Troubleshooting
If your 2FA emails are not being forwarded correctly, check the following:- Verify that the filter is active in your Gmail Filters and Blocked Addresses settings
- Ensure the “From” address in your filter exactly matches the sender of the 2FA emails
- Confirm that
codes@mfa.kaizenautomation.comis listed as a verified forwarding address in Gmail - Contact the Kaizen team if you continue to experience issues